Office Pod Lighting and Controls: Match Paper, Screens and Video to the Task
Choose office pod lighting by separating the work from the control feature. Reading paper, working on a screen, joining a video call and showing a physical object can create different problems even inside the same enclosure. The useful procurement brief therefore states what must be visible, which reflections or shadows must be avoided, who adjusts the light and what the supplier is actually quoting.
MobileX product information identifies basic LED lighting at category level and says lighting configuration can be discussed by project. It does not establish that every quoted model includes dimming, adjustable colour temperature, occupancy sensing, delayed shut-off or video fill lighting. Treat those as separate requirements until the quotation and approved configuration identify them.
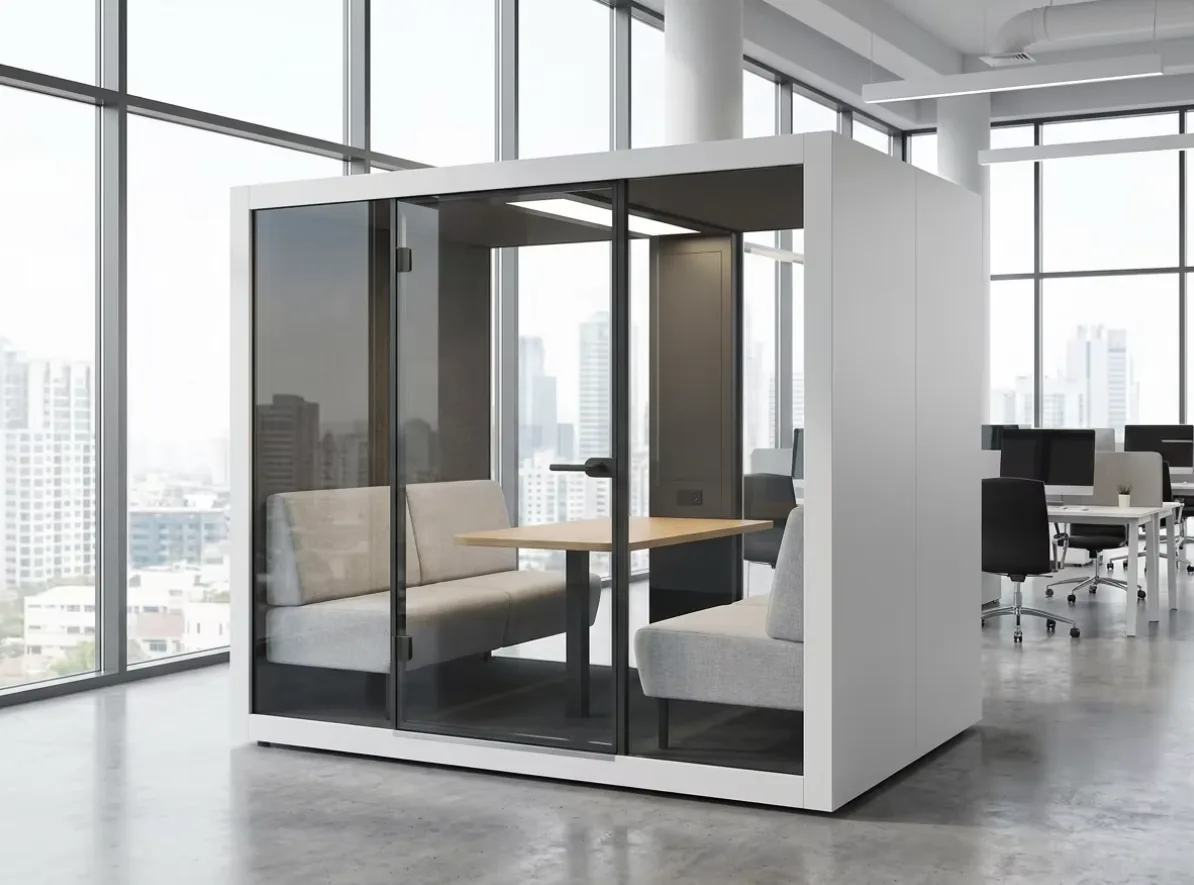
Start with the visual task
A bright-looking pod is not automatically suitable for every task. Put the real paper, screen, camera or sample in the proposed working position and observe the complete view. The UK Health and Safety Executive’s display-screen workstation checklist treats lighting, glare and reflections as part of the workstation assessment, while its DSE guidance recommends arranging the desk and screen to avoid glare or bright reflections and allowing enough space for documents and other equipment. These are workstation principles, not MobileX performance claims.
Scroll horizontally to compare the complete task and lighting brief.
| Task | What the user must see | What to test in the proposed setup | What the quotation should separate |
|---|---|---|---|
| Read or mark paper | Text, notes and the whole working area without the user’s hands or equipment creating a persistent shadow | Representative paper in its normal position, including any document holder and the user’s natural seated posture | General interior light, any dedicated work light, its location and whether it is included, optional or buyer-supplied |
| Work on a laptop or monitor | Screen content and nearby notes without distracting reflections from glass, bright surfaces or the light source | Normal screen angle, brightness, daylight condition and the user’s view after furniture and accessories are in place | Interior lighting provision, control method and any site shading or buyer equipment needed to manage reflections |
| Join a video call | The user’s face and shared content in the actual camera image, not only a bright interior seen by eye | Facial shadows, backlighting, glasses and screen reflections, camera exposure and the relevant daylight condition | Pod lighting, any camera-facing fill light, camera and controls as separate supply items |
| Show a physical object | The object’s relevant surfaces and the user’s hands from the intended camera or viewer position | Object orientation, hand shadows, reflective surfaces, camera angle and whether the object must be moved during the task | Base light, task or demonstration light, stands, power and equipment supplied by each party |
| Shared meeting or presentation | Faces, documents and any shared display from every planned seat | Occupied seats, screen visibility, table items, reflections and changes when a presenter turns or stands | Meeting booth lighting, AV lighting and buyer-supplied presentation equipment with named commissioning responsibility |
The Microsoft Teams meeting-room guidance discusses balanced illumination and avoiding direct backlighting for camera views. Its recommendations describe Teams room planning; they do not prove that an office pod includes a particular light or meets a platform specification. For the complete camera, audio and screen trial, use the existing video-call pod guide.
Separate three lighting layers
Base interior lighting provides general visibility inside the enclosure. It helps a user enter, sit and handle ordinary items, but it should not be assumed to solve a precise paper, screen, camera or product-demonstration task.
Work-surface lighting is directed at the desk, documents or another working area. It may be useful when the base light leaves shadows or when the work surface changes, but its position must be checked against screens, glass, the user’s hands and available surface area.
Video or demonstration fill serves the camera view or a physical object. It can be a buyer-supplied device rather than part of the pod. A ring light, panel or other accessory should not be added to a quotation by name alone: identify its position, power, mounting, user control and whether it creates glare for the person doing the work.
Buying rule: do not make one fitting carry all three jobs without a representative trial. A pod can have adequate general illumination while a camera still shows a shadowed face or a screen reflects a bright panel.
Choose controls around the workflow
A manual switch gives the user a clear action and can be sufficient when one lighting state works for the task. Confirm that the control is reachable from the intended position and that users can understand which light it operates.
Dimming may help a mixed paper, screen or video workflow, but only if the quoted light and driver support it. Ask whether dimming affects one layer or all lighting together, how the setting is changed and whether the last state is retained. Do not infer adjustable colour temperature from a dimming control.
Occupancy sensing can switch or reduce lighting based on detected presence. The US Department of Energy’s occupancy-sensor applications guide distinguishes automatic-on/automatic-off occupancy control from manual-on/automatic-off vacancy control. It also notes that sensor placement and the selected delay affect operation. Use that distinction to write the brief, not as evidence that a MobileX model contains a sensor.
For a seated call, reading session or screen task, include a trial in which the user remains relatively still. The control should not interrupt the task unexpectedly. If automatic shut-off is proposed, define the delay, manual override and restart behavior with the actual control supplier. For shared spaces, also decide whether the next user should inherit the previous setting or start from an agreed default.
Write supply responsibility into the quotation
Use four labels rather than one vague line called lighting: included base provision, quoted option, buyer-supplied equipment and site work. For each item, record the model or description, quantity, location, control method, power interface, installation party and acceptance check.
- Included base provision: identify the light and switch or control that belong to the quoted pod configuration.
- Quoted option: state the added fitting or control, its compatibility with the base system and any drawing change.
- Buyer-supplied equipment: give the pod supplier the product data needed for power, mounting, cable route and clearance review.
- Site work: identify any building power, local electrical connection, programming or commissioning outside the pod supplier’s scope.
This responsibility split follows the same procurement logic as the USB and data connection guide: an interface or control name is not a complete delivered function. The final quotation and approved drawing should agree on the actual components and the party who demonstrates each required result.
Trial the proposed setup before approval
A useful trial does not need a laboratory claim. Use the representative task, furniture, screen or camera and the relevant surrounding light. Check the setup with the door in its normal use position and with nearby windows or office lighting in a realistic state. Record the configuration that was tested and any item that was substituted.
For a video workflow, compare the person’s view with the camera output. For paper, inspect the work surface at the normal writing position. For a display, check both readable content and reflections. For an object demonstration, move the item through the actual sequence rather than approving a still photograph. A showroom observation can help shortlist a configuration, but it is not a measured illumination result or proof of the future site’s daylight conditions.
If one lighting state cannot support the required tasks, decide whether a separate work light, video light or larger existing room is the better answer. A professional recording or colour-critical inspection task may need a purpose-built space and specialist equipment rather than an office pod lighting option.
Choose the product route after the lighting brief
For one-person paper, screen or video tasks, begin with the MP1 and MP1+ office pod buying page. For two or more local participants, shared documents or a larger display, use the MP2 and MP3 meeting booth route and verify the occupied layout. The model name and capacity do not establish a lighting result.
Use the remote training guide when the task includes presenting, shared practice or a physical demonstration. If the required lighting, mounting or control arrangement changes the enclosure or interior layout, send it through the custom modular pod review.
Request a MobileX project quotation with the task list, proposed model, quantity, destination, work-surface or camera arrangement, required lighting layers and the responsibility table. Ask the quotation to name the included base light and every optional or buyer-supplied item. That produces a configuration the buyer can test without turning an unconfirmed feature into a product promise.