Office Pods for Video Calls: Camera, Audio and Lighting Checks Before Buying
Choose office pods for video calls by testing the planned people, seats and equipment together. A pod can provide an enclosed place to meet, but a useful call also depends on camera framing, microphone pickup, lighting and the connection at the installation site. Before ordering, agree on a trial call in which someone outside the pod checks what remote participants actually see and hear.
Start with the meeting workflow, not a camera specification or a photograph. A person joining a video call on a laptop has different requirements from a group using a permanently installed room system. The checks below help IT teams, facilities buyers, dealers and AV integrators compare a proposed setup and turn open questions into an acceptance record.
Define the Call Setup Before Choosing Equipment
One person with a laptop: identify the laptop, usual meeting app and whether the person uses a headset or the laptop microphone and speakers. Check the camera view at a comfortable working position, space for notes, charging access and whether the screen remains readable. Test with the equipment employees will actually bring, including a dock if one is part of the workflow.
Several people sharing a call: decide which device will handle room audio, how every seat will appear on camera and where participants will view shared content. If people bring extra laptops for notes or presentations, agree how they join without creating competing microphone and speaker paths.
A dedicated room system: A dedicated room system requires more planning than running a desktop video-call app inside a pod. Have IT or the AV integrator confirm the selected hardware, accounts, licensing, controller, management and network arrangements. Microsoft's Teams Rooms planning guidance treats these as a coordinated room deployment. Its system requirements should not be applied wholesale to a single user's laptop call.
If occupancy is still undecided, first use the two-person versus four-person meeting booth guide. This article starts after that decision: it checks whether the chosen layout works for the call.
Choose who runs the call before buying the room equipment
For one person who already works from a laptop, start with that laptop and a suitable headset; buy shared room equipment only when it solves a real framing, listening or changeover problem. For several people sharing a screen, compare a laptop-driven room with a dedicated meeting system. The useful difference is who brings the computer, starts the meeting and supports it afterwards, not simply how many cameras appear in the quotation.
Laptop-first: the employee brings the meeting
This is a practical starting point for individual calls across different meeting apps. The user’s own computer supplies the account, application, camera and audio, unless the project adds peripherals. Spending first on a workable seated position, screen placement and face lighting can be more useful than adding a shared controller that a single caller does not need. A headset also avoids using the laptop loudspeaker for the remote participant’s speech, although the caller’s own voice still needs separate consideration outside the pod.
The trade-off is variation between users’ computers and habits. Charging, joining the meeting and selecting audio remain the user’s tasks. If the intended session includes a separate keyboard, notes or a second screen, include those items in the occupied layout rather than evaluating an empty desktop.
Shared USB equipment: a laptop still hosts the meeting
A shared camera, microphone, speaker and display can give a group a repeatable equipment position while a participant’s laptop runs the call. This can suit teams that change meeting platforms or bring different presenters. It adds a connection and handover step: the arriving user must connect, select the intended devices and share content without leaving several audio systems active.
Compare the exact connection path, not the phrase “USB-ready.” The laptop connector, cable, dock or interface and peripherals must support the required functions together. A charging outlet does not establish a camera or display connection. Pay for tested switching or connection hardware when it removes an actual user step; a more expensive camera does not fix an unreliable laptop handover.
Dedicated room system: the room becomes a managed endpoint
A dedicated system can suit a frequently shared meeting pod where users need a consistent joining process without configuring their own computer every time. It also creates an IT-managed installation: the compute device or appliance, controller, accounts, applicable licences, updates and support all belong in the procurement scope. That additional responsibility may be worthwhile for a heavily used shared room, but unnecessary for a single-person laptop call space.
Do not assume a dedicated system can automatically become a laptop-peripheral system for a guest. Zoom’s published BYOD guidance describes that mode for supported room hardware and software, with prerequisites and feature limitations. It establishes that the option exists in specific systems, not that any MobileX pod, display or USB socket supports it. A proposal needing both native meetings and guest-laptop use should identify both working modes and the handover between them.
Put the same working outcome in each price comparison
For a hypothetical two-person video meeting, compare offers with both people visible, shared content readable and one deliberate audio path. Separate the enclosure and furniture from the display, camera, audio, compute device, controller, mounting, cabling and commissioning. Show recurring software or support costs over the same period where applicable. Mark who supplies the laptop and who owns the room accounts; do not assume either is included in the pod price.
The lower hardware total is not necessarily the lower usable-system total if it omits the interfaces or setup needed to run the call. Conversely, a dedicated room system is not automatically better value when staff already join successfully from their own laptops. Once the workflow is chosen, use the camera, audio and lighting checks below to test that specific package. MobileX’s supply is the configuration agreed in the project drawing and quotation, not every device shown in a room-system example.
Check the Camera, Screen and Seats as One Layout
Mark the proposed camera, screen, table and occupied seats on the same drawing. Ask for a view from the camera position, then verify it with people in the planned seats. A wide-angle specification alone does not show whether faces are useful on a remote participant's screen.
- Check the nearest and farthest seats, including people seated at the edges of the table. Faces should remain visible when users sit naturally, turn to colleagues or look at shared content.
- Put laptops and other normal table items in place. Check whether raised screens hide faces or block the camera.
- Look at eye direction. A camera far from the display may show participants looking away whenever they watch the remote caller; compare practical mounting positions before approving one.
- Test any automatic framing mode with the actual seating pattern. Note what happens when someone leans forward, enters or leaves. For equipment with no such feature, assess the fixed view instead.
- Read a representative spreadsheet or drawing on the proposed display from every seat. Check camera clearance, screen height and reflections together rather than approving each separately.
For a laptop setup, repeat the check at the user's normal screen angle. For a room system, use the exact proposed camera and mounting position wherever possible. A trial using substitute equipment is useful for exploring the layout, but record what still needs retesting with the final equipment.
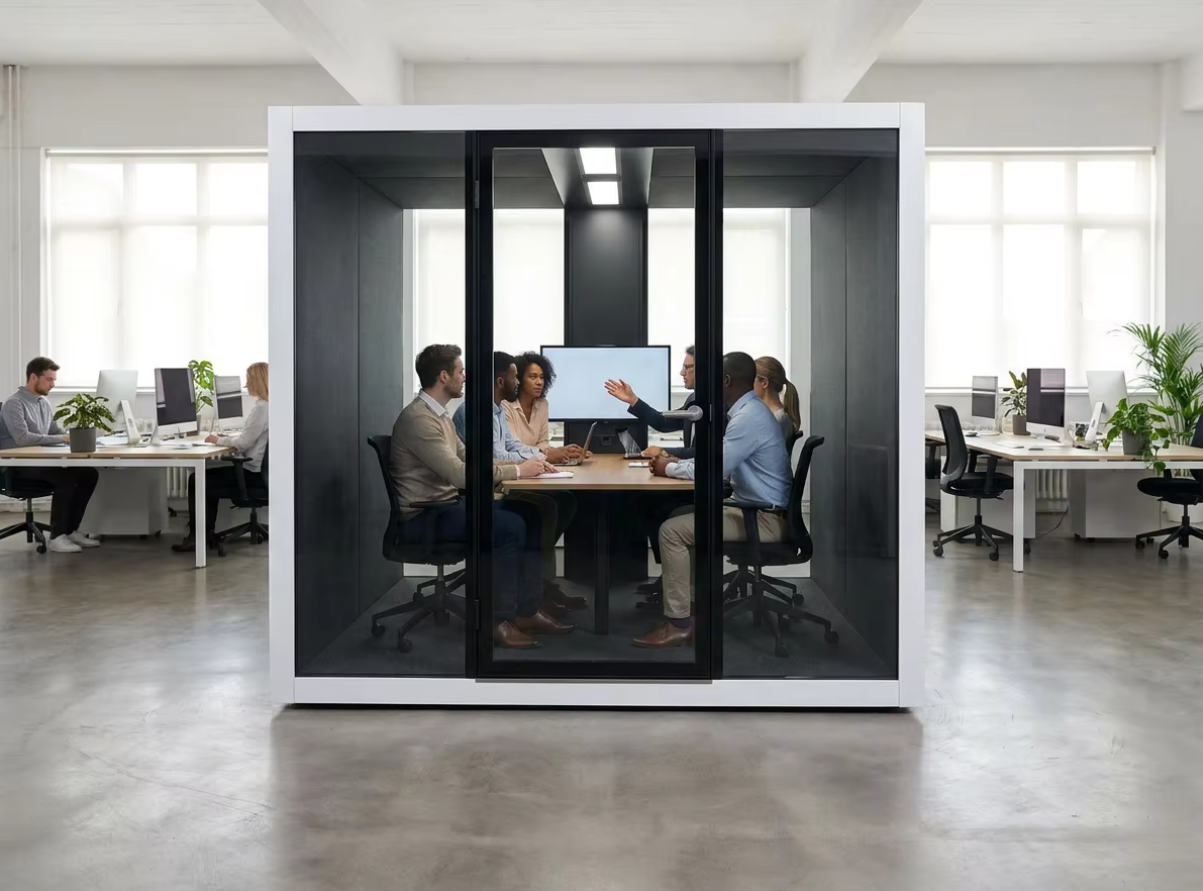
Review acoustic meeting booth options alongside the proposed furniture and equipment layout. Keep the selected equipment list separate from the pod model name.
Before choosing a larger enclosure or camera package, use the camera-view and seating calculation to compare the nearest seats, horizontal coverage and framing-mode distance.
Listen From the Remote End, Not Only Inside the Pod
Sound isolation concerns sound passing between spaces. Call audio quality concerns what the microphone, room and conferencing system deliver to the listener. Neither a pod isolation claim nor a quiet impression inside the pod demonstrates clear remote speech by itself.
Start with the correct input and output selected. Use a speaker and microphone test to check playback and recorded speech. Follow that with a live trial involving an independent remote listener, because local playback alone does not evaluate the whole meeting experience.
Ask each seated participant to speak at a normal level, turn toward a colleague and then take part in a short exchange with the remote participant. Listen for missed words, changes in level, clipped sentence beginnings, audible echo and difficulty when both sides speak. Repeat with ventilation operating in its intended occupied mode and with normal laptop equipment running. Turning fans off only for the demonstration would test a different use condition.
If echo appears, check the audio paths before blaming the enclosure. Multiple active audio devices in one room can cause echo. Disconnect computer audio on devices that do not need to handle the call; muting a microphone alone leaves its speaker active. For a dedicated room system, have the AV integrator check the equipment manufacturer's instructions and confirm the audio-processing setup for the selected hardware.
Record the symptom and configuration, then assign the next check. IT can investigate connection or application behavior; the AV integrator can check device selection and placement; the pod supplier can review an identified fan, fitting or interior-layout issue. For the separate question of ventilation provision, see the airflow, fan count and noise guide.
When choosing the audio package, compare integrated video-bar audio, table speakerphones and supported microphones against the actual speaking positions before adding equipment.
Check Faces, Glass and Shared Content Under Real Lighting
Use the camera image to judge faces, not just how bright the interior looks in person. Microsoft's meeting-room planning guidance recommends balanced illumination and avoiding direct backlighting. These are useful design considerations, not evidence that a particular pod meets a platform standard.
With the intended lighting on, check each seat for facial shadows, an overly bright background and reflections in glasses. Look for windows or ceiling lights reflected in the pod glass and display. Repeat at a relevant daylight condition if the installation is near a window. Any planned blinds or lighting controls should be included in the trial.
Compare the camera view and shared screen together. Improving a face on camera should not make text unreadable or create glare for another seat. Record the lighting setting and camera position that worked, so the installer can reproduce the arrangement. Agree any proposed mounting or lighting changes with the responsible supplier before approving them.
If the room divides, buy defined meeting states
Keep independent meeting systems when the recurring requirement is separate calls and a larger shared meeting can use another suitable room. If the same physical room must regularly open into one larger meeting space, compare a designed combine-and-divide AV arrangement before ordering the partition, furniture or equipment. Opening a wall does not by itself combine the meeting systems, and opening two pod doors does not create a divisible conference room.
Crestron’s divisible-space example describes rooms operating separately and then as one larger AV space. Its Automate VX room-design guidance also identifies furniture positioning for each room configuration. These are named third-party system examples, not evidence that MobileX supplies an operable wall, this equipment or combine-and-divide integration.
Give the AV integrator two layouts and two meeting descriptions. In the divided state, identify the people, display, camera, audio path and joining controls serving each independent session. In the combined state, identify the shared presentation position, occupied seats, displays and the controls that operate the larger meeting. Ask the proposal to explain which components are shared, which remain independent and which need a changed setting or connection. Buying two identical camera kits does not establish that they can perform both jobs.
Run the separate sessions as separate sessions, not one demonstration repeated in an empty room. Confirm that a user can start, adjust and end one meeting without changing the other session’s presentation or audio. Then switch to the agreed combined arrangement and check the remote view, speech and shared content from all planned positions. Include the return to two independent sessions: identify who changes the mode, how the next user recognises it and what happens if furniture is not in the expected position. These are proposed acceptance scenes, not claims about a particular control system’s features or the partition’s acoustic privacy.
Planning example: two teams usually hold unrelated calls, but a weekly briefing brings them together. If that briefing is easily served by an available existing room, independent spaces avoid making daily meetings depend on a combine-and-divide changeover. If the briefing must use the same floor area, compare the complete divided and combined layouts and the integrator’s switching proposal. A workshop requiring shared physical samples remains a co-located task; an online link between separate pods is not an equivalent room arrangement.
Ask the quotation to separate enclosure and partition work from AV equipment, programming, configuration-specific commissioning and operator handover. Include the work and unavailable-room time needed to change modes, using a trial rather than an assumed duration. MobileX can discuss the enclosure and agreed equipment interfaces for the proposed project; an AV integrator must establish the system design and its supply scope. Choose a divisible arrangement only when both operating states justify that additional integration, rather than paying for an unproven promise that the rooms will work together.
Give the Supplier a Short Equipment Interface Brief
For customer-supplied equipment, provide model references and manufacturer drawings or datasheets showing overall dimensions, mounting points, weight, connection locations and any clearance requirements. Identify the display, camera, microphone or speaker device, controller, computer and dock that are actually planned.
Mark cable routes, connection access and power needs on the layout. Confirm who supplies mounting hardware, who installs devices, who completes local connections and who commissions the call system. An interface provision and an installed, configured device are different supply items. Use the custom office pod drawing-approval guide for the detailed drawing and supply-boundary process.
Use a Trial-Call Acceptance Record
Agree the test scenes and acceptance criteria before the demonstration. Include a buyer representative inside the pod, an independent remote participant and the IT or AV person responsible for the meeting setup. The following is a suggested procurement worksheet, not a claim that MobileX has already tested the proposed configuration.
Scroll horizontally to compare all columns on a narrow screen.
| Test scene | What participants check | What to record | First follow-up owner |
|---|---|---|---|
| Join using the normal workflow | An ordinary user can start the call, select devices and share content | App or room-system version, device list, connection method and any failed step | IT / AV integrator |
| All planned seats occupied | The remote participant can see each face; laptops do not block the view | Seat sketch, camera location, framing mode and missing views | AV integrator / layout designer |
| Speech from every seat | The remote participant can follow normal speech without repeated requests | Seat, task, missed words or level changes; ventilation setting | AV integrator, with supplier review for an identified pod issue |
| Short two-way conversation | Neither side hears a returning voice or loses the exchange when speech overlaps | Active audio devices, settings and when the symptom occurs | IT / AV integrator |
| Screen sharing with lights and daylight | Faces remain usable on camera; content is readable from each seat | Lighting state, glare or reflection location and affected seat | Facilities / AV integrator |
| Representative occupied session | Call behavior remains usable during the intended meeting activity | Actual duration, equipment and any interruption; retest needed at the final site | IT / facilities, then the responsible supplier |
Keep notes rather than recording people by default. If photos or recordings are needed, agree consent and the organization's information-handling requirements first. For each unresolved item, add an owner, proposed action and retest date. Change one relevant variable at a time where practical, and retain the result from the original setup for comparison.
Separate a pre-order layout demonstration from final-site acceptance. The final check should use the installed furniture, agreed equipment, occupied ventilation mode and normal site connection. A showroom or remote demonstration cannot establish the future site's network performance.
Request a Video-Call Pod Layout Review
Send MobileX POD a brief that connects the enclosure to the meeting workflow:
- Participants and use: [number of people, one-to-one or group calls, typical activities]
- Platform and setup: [laptop app, customer equipment or proposed room system]
- Equipment: [model list and available datasheets]
- Layout: [floor plan, seating, screen and camera positions]
- Site conditions: [windows, available connections and installation constraints]
- Supply and acceptance: [factory items, local work, trial-call participants and open decisions]
Use the project inquiry form to request a layout and supply-scope discussion. Ask the quotation to identify the agreed pod configuration and any included equipment or provisions explicitly. This turns a search for a video-call pod into a defined purchase that IT, facilities and the supplier can review together.